
 Germany
 Netherlands
 United Kingdom
 France
 Poland
 Spain
Spain Sweden
 Bulgaria
 Greece
 Romania
 Turkey
 Russia
 Pakistan
 India
India Singapore
 United Arab Emirates
 Saudi Arabia
 Japan
Japan South Korea
 China
China Indonesia
 Malaysia
 Thailand
 Vietnam
 Philippines
 Bangladesh
 Nepal
Nepal Israel
 Qatar
Qatar Kuwait
 Bahrain
 Oman
Oman Iraq
Iraq Cambodia
 Myanmar
 United States
 Canada
 Mexico
 Argentina
 Brazil
 Chile
Chile Colombia
 Peru
Peru Ecuador
 South Africa
 Egypt
Egypt Australia
Guides
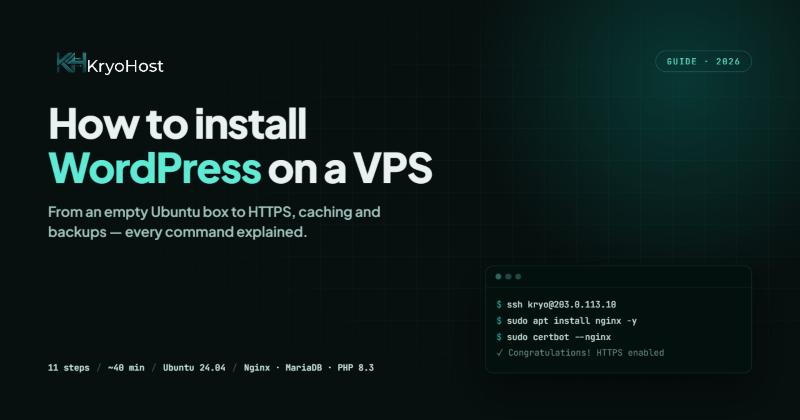
How to Install WordPress on a VPS: The Complete 2026 Guide
8 October 2026
Shared hosting is fine until the day it isn't. The day usually looks like this: a post does well, 300 people arrive at once, and the site that loaded in a second starts taking eleven — or returns a 503 and nothing else. You didn't do anything wrong. You were simply sharing a machine with four hundred other sites, and one of them had a bigger day than you did.
A VPS fixes that by giving you your own slice of a server: your own CPU cores, your own RAM, your own disk, and root access to all of it. The trade is that nobody sets it up for you. This guide covers the whole job, from an empty Ubuntu box to a WordPress site running on HTTPS with backups — in the order a working sysadmin would actually do it.
Budget about 40 minutes the first time. Every command here is meant to be copied as written.
What you need before you start
- A VPS running Ubuntu 24.04 LTS. Any provider will do; we'll assume a fresh install with nothing on it. If you don't have one yet, our Cloud VPS plans deploy in about 60 seconds.
- A domain name you can edit DNS for. If you need one, register it here.
- The server's IP address and root password, which your provider emails you after the build.
- A terminal. macOS and Linux have one built in. On Windows, use PowerShell or Windows Terminal — both ship with
sshnow.
How much VPS do you actually need?
This is where most people overspend or, more often, underspend. For WordPress specifically:
- 1 vCPU / 2 GB RAM — a brochure site, a portfolio, a blog under roughly 20,000 visits a month. This is enough, and anyone who tells you otherwise is selling something.
- 2 vCPU / 4 GB RAM — WooCommerce with a few hundred products, a membership site, or a blog doing serious traffic. The extra RAM matters more than the extra core, because that is what object caching lives in.
- 4 vCPU / 8 GB RAM — a busy shop, several sites on one box, or anything running heavy page builders.
Disk matters less than people expect. A typical WordPress install is under 1 GB; it's uploads and backups that grow. 50 GB of NVMe is plenty to start, and you can add more later.
Pick the location before you pick the plan
Latency is the one thing you cannot buy your way out of after the fact. Every request has to physically cross the distance between your visitor and your server, and no amount of RAM shortens that trip. If most of your readers are in Pakistan or the Gulf, a box in the UAE will feel faster than a far bigger one in Texas. European audience, Frankfurt or the Netherlands. UK-only, London. Local audience in Pakistan, Karachi or Lahore.
Choose the closest location to your readers first, then size the plan.
Step 1 — Log in for the first time
Open your terminal and connect, replacing the IP with your own:
ssh root@203.0.113.10The first time, you'll be asked to confirm the server's fingerprint. Type yes. Then enter the root password your provider sent. You're in.
Update everything before you do anything else. A fresh image is usually a few weeks behind on security patches:
apt update && apt upgrade -yIf this ends by asking about a new kernel or restarting services, accept the defaults.
Step 2 — Secure the server before you put anything on it
Do this now, not later. A server with a public IP starts receiving automated login attempts within minutes of coming online — not because anyone is targeting you, but because the whole address space is scanned continuously. "Later" is how sites get compromised in week one.
Create a normal user
Working as root means every typo is permanent. Make a user for yourself and give it sudo rights:
adduser kryo
usermod -aG sudo kryo
Set a strong password when prompted. Everything from here on runs as that user.
Set up SSH keys and turn off password login
Passwords can be guessed; a key cannot be, in any practical sense. On your own computer — not the server — generate a key if you don't have one:
ssh-keygen -t ed25519 -C "your@email.com"Press Enter three times to accept the defaults. Then copy it to the server:
ssh-copy-id kryo@203.0.113.10Now test it in a second terminal window, leaving your current one open: ssh kryo@203.0.113.10. If it logs you in without asking for a password, the key works.
Only once that works, disable password logins on the server:
sudo nano /etc/ssh/sshd_configFind and set these three lines:
PermitRootLogin no
PasswordAuthentication no
PubkeyAuthentication yes
Save with Ctrl+O, Enter, Ctrl+X, then restart SSH:
sudo systemctl restart sshKeep that first window open until you have confirmed a new login works. If you lock yourself out, you'll need your provider's console to get back in.
Turn on the firewall
sudo ufw allow OpenSSH
sudo ufw allow 'Nginx Full'
sudo ufw enable
That leaves exactly three doors open: SSH, HTTP and HTTPS. Everything else is shut. Check it with sudo ufw status.
Install fail2ban
It watches the logs and bans IP addresses that keep failing logins:
sudo apt install fail2ban -y
sudo systemctl enable --now fail2ban
The defaults are sensible — ten minutes of banishment after five failures. You can leave it alone.
Step 3 — Install the stack (Nginx, MariaDB, PHP)
We'll use Nginx rather than Apache. On a small VPS the difference is real: Nginx holds far more idle connections for the same memory, which is exactly what a blog with a traffic spike needs.
sudo apt install nginx mariadb-server php8.3-fpm php8.3-mysql php8.3-curl \
  php8.3-gd php8.3-mbstring php8.3-xml php8.3-zip php8.3-intl php8.3-bcmath -y
Those PHP extensions are not optional padding — WordPress and most serious plugins expect every one of them. Installing them now saves a confusing error later.
Visit http://your-server-ip in a browser. You should see Nginx's welcome page. If you do, the web server is alive.
Lock down MariaDB
sudo mysql_secure_installationAnswer as follows: switch to unix_socket authentication — no (it complicates WordPress); set a root password — yes, and use a long one; remove anonymous users — yes; disallow remote root login — yes; remove the test database — yes; reload privileges — yes.
Step 4 — Create the WordPress database
sudo mysql -u root -pAt the MariaDB prompt:
CREATE DATABASE wordpress DEFAULT CHARACTER SET utf8mb4 COLLATE utf8mb4_unicode_ci;
CREATE USER 'wpuser'@'localhost' IDENTIFIED BY 'a-long-random-password-here';
GRANT ALL PRIVILEGES ON wordpress.* TO 'wpuser'@'localhost';
FLUSH PRIVILEGES;
EXIT;
Two things worth noticing. utf8mb4 is the character set that can actually store emoji and non-Latin scripts — the older utf8 silently mangles them. And the user is restricted to localhost, so even if the password leaked, nobody could connect to it from outside the machine.
Write that password down somewhere safe. You need it once, in the next step.
Step 5 — Download and place WordPress
cd /tmp
curl -O https://wordpress.org/latest.tar.gz
tar xzvf latest.tar.gz
sudo mkdir -p /var/www/yourdomain.com
sudo cp -a /tmp/wordpress/. /var/www/yourdomain.com/
Now set ownership so that the web server can read the files and WordPress can write uploads, but nothing more:
sudo chown -R www-data:www-data /var/www/yourdomain.com
sudo find /var/www/yourdomain.com -type d -exec chmod 755 {} \;
sudo find /var/www/yourdomain.com -type f -exec chmod 644 {} \;
Those permissions matter more than they look. Never use chmod 777, whatever a forum post from 2013 tells you — it makes every file writable by every process on the server, which turns one vulnerable plugin into a fully compromised machine.
Configure wp-config.php
cd /var/www/yourdomain.com
sudo cp wp-config-sample.php wp-config.php
sudo nano wp-config.php
Fill in the three database values you just created:
define( 'DB_NAME', 'wordpress' );
define( 'DB_USER', 'wpuser' );
define( 'DB_PASSWORD', 'a-long-random-password-here' );
Then replace the block of "authentication unique keys and salts" placeholders. Generate real ones at https://api.wordpress.org/secret-key/1.1/salt/ and paste them over the existing lines. These are what sign login cookies; leaving the placeholders in means anyone can forge a session.
While you're in the file, add this above the "stop editing" line — it stops WordPress from asking for FTP details when it updates:
define( 'FS_METHOD', 'direct' );Step 6 — Tell Nginx about the site
sudo nano /etc/nginx/sites-available/yourdomain.comPaste this, changing the domain in all three places:
server {
    listen 80;
    server_name yourdomain.com www.yourdomain.com;
    root /var/www/yourdomain.com;
    index index.php index.html;

    client_max_body_size 64M;

    location / {
        try_files $uri $uri/ /index.php?$args;
    }

    location ~ \.php$ {
        include snippets/fastcgi-php.conf;
        fastcgi_pass unix:/run/php/php8.3-fpm.sock;
    }

    location ~ /\.ht {
        deny all;
    }

    location = /xmlrpc.php {
        deny all;
    }
}
Three lines there are doing real work. try_files is what makes pretty permalinks work. client_max_body_size 64M is what lets you upload a theme or a large image without a cryptic "413" error. And denying xmlrpc.php closes the single most brute-forced endpoint in WordPress — if you don't use the mobile app or Jetpack, you will never miss it.
Enable the site and reload:
sudo ln -s /etc/nginx/sites-available/yourdomain.com /etc/nginx/sites-enabled/
sudo rm /etc/nginx/sites-enabled/default
sudo nginx -t
sudo systemctl reload nginx
Always run nginx -t before reloading. It checks the config, and it is the difference between a typo you fix in ten seconds and a site that is down while you work out why.
Step 7 — Point your domain at the server
In your domain's DNS settings, create two records:
- A record — host
@, value203.0.113.10(your server IP) - A record — host
www, value203.0.113.10
DNS changes usually take 5 to 30 minutes, occasionally a few hours. Check with dig +short yourdomain.com — when it answers with your server's IP, you're ready. Don't go on to SSL before this resolves, because the certificate check needs to reach your server through the domain name.
Step 8 — Free SSL with Let's Encrypt
sudo apt install certbot python3-certbot-nginx -y
sudo certbot --nginx -d yourdomain.com -d www.yourdomain.com
Enter an email for expiry warnings and choose the redirect option when offered — that sends all HTTP traffic to HTTPS automatically. Certbot edits your Nginx config for you and installs a renewal timer, so the certificate renews itself every 60 days with no action from you.
Confirm the timer exists:
sudo systemctl list-timers | grep certbotStep 9 — Finish the install in your browser
Go to https://yourdomain.com. WordPress will ask for a site title, an admin username, a password and an email address.
Two rules for the admin account. Do not call it admin — that is the username every brute-force script tries first. And use a genuinely long password; a password manager makes this free.
Once you're in, go to Settings → Permalinks and choose Post name. Default WordPress URLs look like /?p=123, which is bad for both readers and search engines, and changing it later means every existing link breaks.
Step 10 — Make it fast
You have a whole server now. Use it.
Tune PHP
sudo nano /etc/php/8.3/fpm/php.iniSet these:
memory_limit = 256M
upload_max_filesize = 64M
post_max_size = 64M
max_execution_time = 120
Then sudo systemctl restart php8.3-fpm.
Add object caching with Redis
WordPress asks the database the same questions over and over. Redis keeps the answers in memory, and on a dynamic site — WooCommerce especially — it is the single biggest win available:
sudo apt install redis-server php8.3-redis -y
sudo systemctl enable --now redis-server
sudo systemctl restart php8.3-fpm
Then install the Redis Object Cache plugin in WordPress and click Enable. That's the whole setup.
Add page caching
Object caching speeds up building a page; page caching skips building it at all. Install FastCGI Cache at the Nginx level, or the simpler route — WP Super Cache or LiteSpeed Cache from the plugin directory. On a small VPS, a page cache is typically the difference between 60 concurrent visitors and 600.
Step 11 — Back it up, today
A VPS is yours, which also means the backups are yours. Nobody is quietly keeping a copy for you unless you arranged it.
A simple nightly dump, to start:
sudo nano /usr/local/bin/wp-backup.sh#!/bin/bash
DATE=$(date +%F)
mkdir -p /var/backups/wp
mysqldump -u wpuser -p'your-password' wordpress | gzip > /var/backups/wp/db-$DATE.sql.gz
tar -czf /var/backups/wp/files-$DATE.tar.gz /var/www/yourdomain.com
find /var/backups/wp -type f -mtime +14 -deletesudo chmod +x /usr/local/bin/wp-backup.sh
sudo crontab -eAdd one line to run it at 3am:
0 3 * * * /usr/local/bin/wp-backup.shThat keeps a fortnight of nightly backups and deletes the rest. One important caveat: a backup stored on the same server is not a backup. If the disk fails, both copies go. Copy them off to object storage, another server, or your own machine — and restore one once, to prove it works. An untested backup is a guess.
Common mistakes, and what they look like
"502 Bad Gateway"
Nginx can't reach PHP. Nine times out of ten the socket path in your config doesn't match your PHP version — check that fastcgi_pass says php8.3-fpm.sock and not php8.1-fpm.sock. Confirm with systemctl status php8.3-fpm.
"Error establishing a database connection"
Usually a wrong value in wp-config.php, and usually the password. Test the credentials directly: mysql -u wpuser -p wordpress. If that fails, WordPress was never going to succeed.
White screen, no error
A PHP fatal error with display turned off. Add define( 'WP_DEBUG', true ); and define( 'WP_DEBUG_LOG', true ); to wp-config.php, reload the page, then read wp-content/debug.log. Remember to switch both off afterwards.
Permalinks 404 on every page but the homepage
The try_files line is missing or wrong in your Nginx block. The homepage works because it's index.php either way.
Uploads fail on larger files
Three limits must all be raised together: client_max_body_size in Nginx, and upload_max_filesize plus post_max_size in PHP. Raising one and not the others is the usual cause.
Frequently asked questions
Can I host more than one WordPress site on one VPS?
Yes, and this is one of the better reasons to have one. Each site gets its own folder under /var/www/, its own database, its own Nginx server block and its own certificate. On 4 GB of RAM, three or four modest sites sit together comfortably.
Do I need cPanel?
No — everything above was done without one, and a control panel licence often costs more than the server. A panel earns its keep when you're managing sites for clients, or when someone else needs to log in and work without the command line.
Is a VPS actually faster than shared hosting?
For the same money, not always — a cheap VPS can lose to good shared hosting. What it gives you is predictability: the resources are yours, so your site doesn't slow down because a neighbour had a busy afternoon. And it scales, which shared hosting fundamentally does not.
What if I break something?
Take a snapshot before any big change — most providers offer them, and restoring takes a couple of minutes. It is the cheapest insurance in hosting.
Should I use Apache instead of Nginx?
Apache is perfectly good, and .htaccess support makes some plugins simpler. But on a small VPS, Nginx handles concurrency on noticeably less memory, which is exactly the constraint you're working under.
Where to go from here
You now have a WordPress site on your own server, on HTTPS, behind a firewall, with caching and nightly backups. That is a better setup than a great many sites running on far more expensive hosting.
A few things worth doing in the first week: install a security plugin such as Wordfence, set up uptime monitoring, turn on automatic background updates for minor WordPress releases, and add a staging copy before you start experimenting with themes.
If you'd rather someone else ran the stack, our managed WordPress hosting does all of the above for you. And if you're ready to build it yourself, our Cloud VPS plans start small and deploy in under a minute — in whichever of our locations is closest to your readers.
Stuck on a step? Send us a message — we answer our own tickets, and we've set this up more than once.
Want hosting that matches the advice in this post?
See our current plans, or get in touch if you have a question before you buy.